Embedding Forecast.io Weather Into a SharePoint Page
-
 Nigel Browne
 - May 03, 2017

Awhile back I stumbled across forecast.io and darksky.net. I was really impressed with the product those guys have created and their story. The app is beautiful, responsive and really accurate. I wanted to display the local weather in a SharePoint page and the Forecast.io widget was exactly what I needed.
Getting the URL for the Widget
To use the widget, you’ll need to build an URL that calls to Forecast.io. An example URL is:
The example is for a spot nearby in Toronto. To build your own link, you’ll need to know the GPS coordinates1 for the spot you want weather for (they’re easy to google for). You’ll also want to specify the name or title that should be displayed and the units. For the full information on building the URL, see https://blog.darksky.net/forecast-embeds/.
Adding the Widget to your Modern SharePoint Page
Normally I’d dive in here and explain how to get this little bit of code working, but adding the widget relies on our SharePoint site being allowed to talk to external sites. This means we need to allow an “external iframe”2, before we can add the widget.
Allowing External Sites and iframes
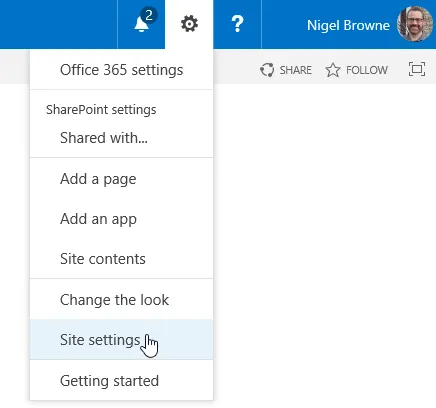
Click on the gear icon and then “Site Settings”
Click on the “HTML Field Security” link in the “Site Collection Administration” section.
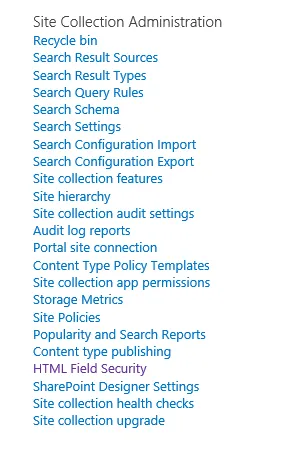
2.1) Don’t see the “Site Collection Administration”? Make sure you’re at the top or root site of the collection and that you have access to the settings.
2.2) Don’t see the “HTML Field Security” link? It might not be enabled for your SharePoint. To fix this, first go to Starbucks and buy a fancy caffeinated beverage. Take that to your SharePoint administrator and give it to them. They’ll need to enable the “Custom Script” options in the “Settings” section of the “SharePoint admin center”. Once it’s turned on, it can take up to 24 hours for it to take effect in SharePoint Online.
- You should now see the “HTML Field Security” settings page. Potentially after visiting Starbucks, bribing a fellow coworker and finding something else to occupy you for 24 hours. Ask me how I know.
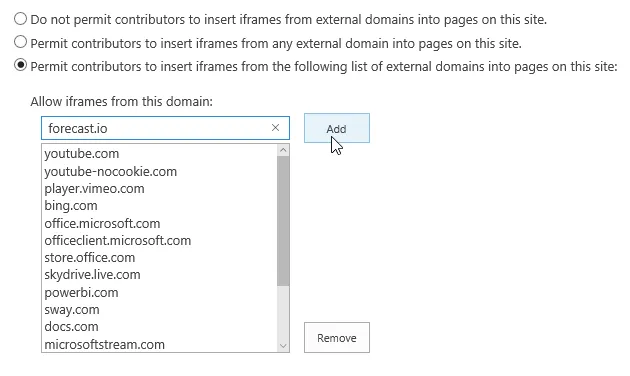
- Type “forecast.io” into the “Allow iframes from this domain” and click on the “Add” button. Then click the “Ok” button.
Adding the Widget (for real)
- Create a new page and change the title to “Local Weather”. You’ll notice I’m using the new “modern experience” SharePoint pages.
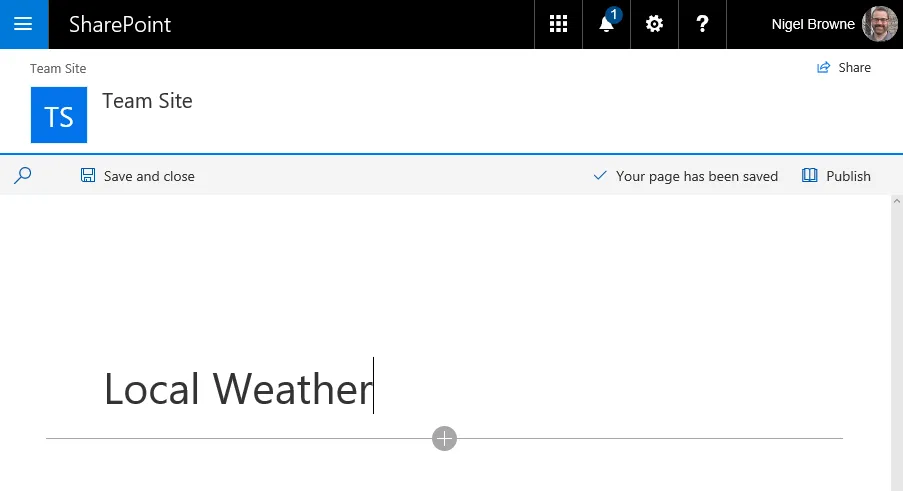
- Click on the ”+” to add a new web part

- Click on the “Embed” web part to add it to the page
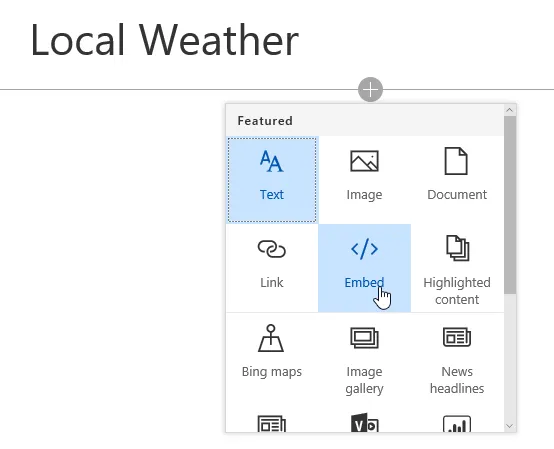
- SharePoint will add the new web part and should open the settings panel on the right. In the “WebSite address or embed code”, you’ll need to add the snippet below, but change the “src” section to use the widget URL you created earlier.
    <iframe
       height="245px"
       width="1000px"
       src="https://forecast.io/embed/#lat=43.6532&lon=-79.3832&name=Toronto,%20Canada&color=#00aaff&font=Georgia&units=ca">
    </iframe>
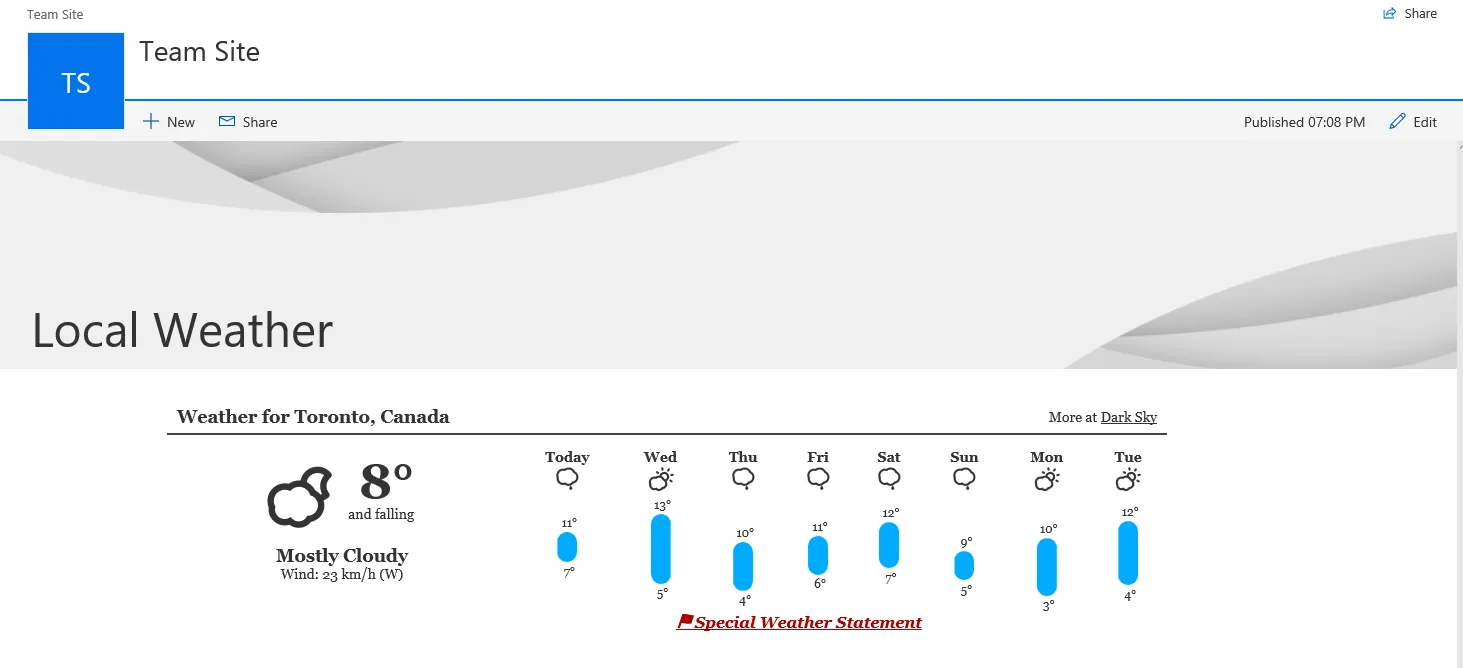
- Finally, click on the “Publish” icon to save, then publish your page. You should now see your published page with the weather embedded in it. It’ll look something like this image:
Caveats, Issues, and Annoyances
The new SharePoint modern experiences are great, forecast.io is beautiful but because of the (current) limitations of the embed web part, the height and width of the weather are fixed values. This means that those gorgeous weather icons don’t look nearly as nice when shrunk down to fit on a phone or small screen or will disappear entirely. This shouldn’t be a problem if you’re using the classic experience and using a content editor or code snippets web parts instead. The solution for the modern SharePoint sites might be a custom web part and that might be a future blog post. Stay tuned.
Footnotes
-
Specifically, you’ll need the longitude and latitude of the location you want the weather information for. ↩
-
Not a code monkey? That’s ok. An “iframe” is a tag, or a bit of code, that allows a web page to embed another document or page into it. Think of it as a magic portal to somewhere else on the interwebs. ↩


